Smart RC Car
Overview
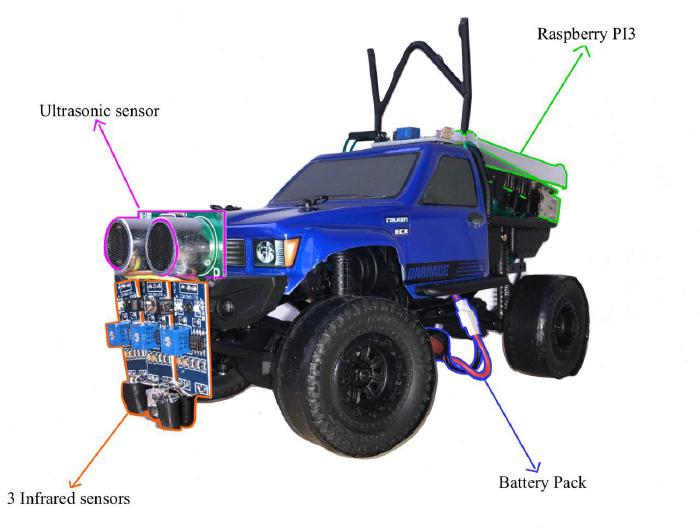
With this project I carried out an implementation of a smart control mechanism for a physical remote-controlled car through a web application. The car is equipped with an ultrasonic sensor to detect possible obstacles in front of it, three infrared sensors to enable an auto drive option that allows the car to automatically follow a black line depicted on the floor and the Raspberry PI3 single board computer that powers the sensors and hosts a web server on which the web application is running. The web application allows to start and stop the motors of the car (a traction DC motor and a servo motor for turning the wheels), enable the auto-drive option and manually control the speed and steering of the car.
Equipment
- Toy car model 1/24 Barrage 4WD Scaler Rock Crawler RTR;
- 4.8V 220mAh NiMH Battery Pack;
- Raspberry Pi 3 Model B;
- Three Infrared sensors FC51;
- Ultrasonic sensor US100.
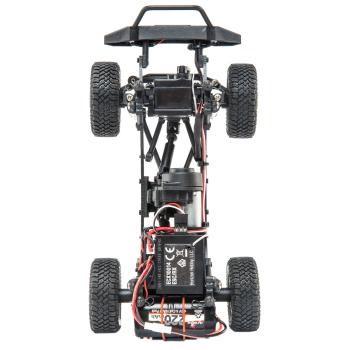
Hardware
Software
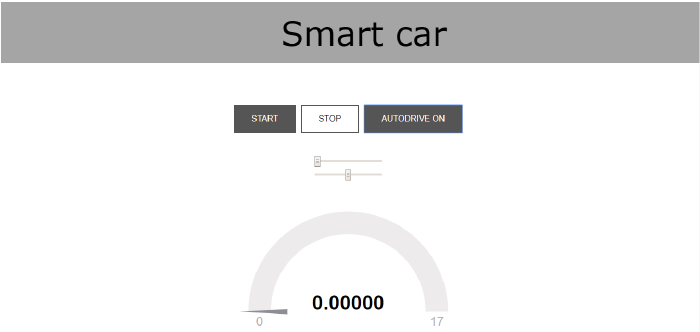
The web application interface allows you to turn on/off the DC motor and the servo motor using the START/STOP buttons, and to enable/disable the auto-drive mode using the AUTODRIVE button. The two sliders allow manual control for regulating the speed and the steering angle. The gauge graphically shows the car’s speed.
The software part consists of three python files:
- Server.py – using the flask web application framework to create and render the web application with all the manual controls for the car’s movements.
- MotorA.py – controlling the DC motor and reading serial data from ultrasonic sensor;
- MotorB.py – controlling the servo motor and reading data from infrared sensors for autonomous driving.
and one HTML file:
- Index.html – creating the web application interface and implementing the client-server communication through the Javascript library Socket.IO.
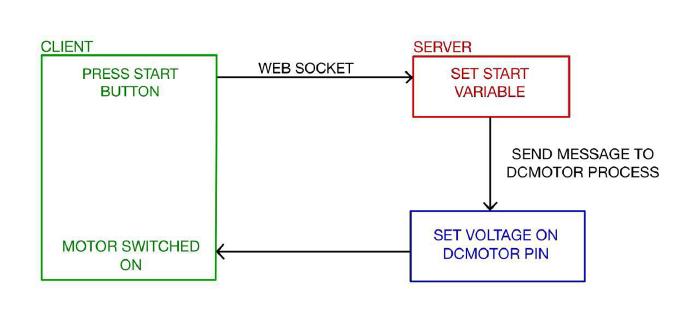
The basic functioning can be schematized as follows:
- On the web application the START button is pressed;
- A message is sent on web socket communication, and a variable is set on the server.
- An inter-process message is sent to the MotorA process, that sets the high voltage on the DC Motor PIN.
- The DcMotor is switched on.
The same can be said for all other buttons in the web interface, as well as for the sliders controlling DC motor’s speed and servo motor’s angle.